The Role of Musica Software for Abdominal Screening

Imaging technology has made significant improvements for radiologists to perform abdomen exams effortlessly. This advanced software processes images of different body parts with precision. From optimising image quality to identifying important details – it helps radiologists see more clearly. The imaging software also adjusts brightness and reduces noise in the image. The best example is the Muscia software, which can accurately examine diverse body parts in an advanced form. Compared to traditional imaging film, the user-friendly features enhance image quality and allow easy detection of essential structures in soft tissue and bone. With such imaging solutions, one can get results from imaging with more effort than in the past. Let us discover how it helps perform abdominal screening with utmost convenience. Improved Image Clarity for Abdominal Exams Clear images of the bowel walls are vital in abdominal screening. The Musica software helps you see dense and less dense areas simultaneously, so radiologists can check for abnormalities in both bones and soft tissues. You also don’t need to manually adjust the window levels (which saves time and ensures utmost consistency). The software helps with clear views of the abdominal organs, catheters, stents, etc. With the use of Digital Radiography AGFA, you can improve the overall quality of images for better diagnosis. The following are the key benefits: Better View of the Bowel Wall The software makes it easier to see the bowel walls clearly, which means radiologists will find it easier to spot problems in the belly area. The software makes the walls of the intestines show up more clearly on the screen, which means professionals can quickly see whether anything looks unusual or if there are changes in the tissue that need medical attention. Check Both Non-Dense and Dense Areas With this digital radiography AGFA solution, you can see both the dense and non-dense parts of the body simultaneously. This is helpful because the professional does not have to keep switching between different views, making the diagnosis easier and offering more accurate results. Better View of the Abdominal Organs The Musica software helps see organs and medical equipment inside the body more clearly. Things like stents, catheters and other devices show up better in the images. This is great because radiologists can easily check whether the equipment is in the right place and working properly. Differentiates of Skin and Fat Layers The ability to distinguish between different tissue types is critical in abdomen exams. The software, compared to imaging films, helps show the contrast between skin and fat layers. It lets you get a clear picture of skin and fat layers separately. This is especially useful when you’re looking at the edges of the body in the image. It helps professionals understand and explain things better to the patients. So, you can make accurate diagnoses in less time with the advanced technology. Better visibility means fewer errors and clearer decision-making in critical cases. Find out more about the best solutions for digital radiography AGFA. Contact the Agfa Radiology team for further details.

What are the Different Phases of Clinical Trials?

Clinical Trials are very time-consuming, and that’s why they are divided into multiple parts. These phases of clinical trials make it easier to conduct the entire trial without much stress. There are four phases in any clinical trial, and the number of phases might change depending on the length of the trial. These phases are designed in a way to help researchers smoothly conduct the trials. Each phase has a different purpose in the trials, and that’s what we are going to learn in this blog post. Phases of Clinical Trials #1 – First Phase The first phase is designed to kick-start the trial. In this phase, the researchers start grouping the participants. The participants are grouped according to their health issues, severity and many other things. After that, the researchers start administering the medicine or the treatment options. As there are only a few people in this phase, the researchers identify the safety of the medicine. If any adverse effects are observed, the researchers adjust the dosage to identify the safe dosage. #2 – Second Phase In the second phase, the researchers accept a few more participants. There are more than a few hundred participants for better experimentation. As the safety and dosage are determined in the first phase, the researchers focus on the effectiveness of the medicine. They also focus on various factors like dosage optimizations. This phase is very important as the trial can be paused if any issues are encountered. Related Posts: Addressing the Accuracy Crisis in Clinical Trial Imaging Embracing Technology in Clinical Operations: A Conversation with Bonne Adams of Inhibrx How Causal Machine Learning is Transforming Clinical Trials Unpacking New FDA Guidance: Processes and Practices for BIMO Inspections #3 – Third Phase The third phase is the biggest phase and the final active phase. In this phase, the researchers recruit a huge number of participants. This phase is important to understand the effects of the medicine on a wide range of populations. This phase includes the diverse participants from all over the world or the country. This is the last active phase, and after completion, the researchers focus on the data collection and analysis and wait for the final approval. #4 – Fourth Phase The fourth is the final phase, and in this phase, the researchers submit the report to the government authorities. The regulatory authorities or the government analyze the reports and the provided data. Once the authorities are satisfied with the results, they provide the final approval, and the medicine or treatment option can be made available to the public. Final Words Even though the phases of clinical trials make it look easier and streamlined, they take a long time from initiation to completion. It’s all the skill and perseverance of the researchers to conduct these trials and finalize the groundbreaking medicines for the common people. Keyword – phases of clinical trials

How to Choose the Right Coverage for Your Medical Needs

We always want ourselves and our loved ones to be healthy. However, healthcare nowadays is putting more and more financial burden on people. That is where you need to have health insurance that covers all the medical expenses. It’s essential to make sure you and your family are protected against unexpected medical expenses. There are so many options available for health coverage plans, but it’s essential to choose the one that can provide you with strong features and maximum benefits to protect you from unexpected events. Here is how you can select the proper coverage for your needs. 1. Assess Your Health Needs The first and the most important thing you can do is to assess your health needs, which may either be your current situation or in the future. It’s important because many health insurance providers have different plans to offer. If you only require preventive care, then a basic plan may be enough for you. On the other hand, if you have any chronic disease that requires regular doctor visits and medications, then you need a more comprehensive plan that can cover hospital stays, specialists, and medications. That’s why make sure to assess your health needs before you choose any plan for you. 2. Research and Compare Different Health Plans Once you have assessed your health needs, now you research different health plans available by the insurance companies. Each plan offers different levels of coverage, so you should be sure to look closely at what each option includes. Many insurance companies work with only specific doctors and hospitals. You have to make sure the insurance plan you choose allows you to get treatment from the doctor you want. You should shortlist the potential plans you are looking for and compare them. You can opt for health insurance plans that can provide solutions tailored to your needs. 3. Evaluate Premiums, Copayments, and Deductibles Health insurance policies are a long-term commitment. That’s why you should consider how much you can afford. You should look for premiums, co-payments, and deductibles. It’s really important because they really affect how much you’ll spend each year on healthcare. Premium is an amount you have to pay regardless of the services you use. You might be thinking of a lower premium plan, but they often come with higher deductibles and fewer benefits. That’s why you should make sure to balance the monthly cost with potential expenses for care to ensure you don’t exceed your budget. 4. Look Into Additional Benefits Many insurance companies provide extra benefits other than medical coverage. These additional services can include wellness programs, mental health support, and vision or dental care. It’s also possible you may get discounted gym memberships. There are also some additional features, such as catastrophic coverage. These coverages provide protection against extremely high medical bills. Some insurance plans provide a Health Savings Account (HAS), which basically allows you to save pre-tax money for medical expenses. So, make sure you choose a plan that not only covers your health-related issue but also provides some extra benefits.

Why Spinal Stenosis Treatment Is Crucial For Restoring Spinal Function

Back and limb pain, numbness, and weakness are all symptoms of spinal stenosis, which can significantly impact your quality of life. This condition occurs when the spaces within your spine narrow, putting pressure on the nerves through the spinal cord. This condition can worsen, leading to decreased mobility and overall health. Understanding the importance of spinal stenosis treatment is crucial for anyone who wants to regain normal spinal function and live a pain-free life. 1. Understanding Spinal Stenosis: What Happens To Your Spinal Cord? Spinal stenosis most commonly occurs in the lower back (lumbar spine) or neck (cervical spine). Over time, wear and tear due to ageing or injuries can cause the spinal canal to narrow, compressing the spinal cord and nerve roots. This compression causes symptoms such as pain, tingling and muscle weakness, which can limit your ability to carry out everyday activities. In severe cases, it can cause permanent damage to the spinal cord, resulting in chronic pain, loss of sensation or even paralysis. It highlights the importance of addressing spinal stenosis early to prevent further complications and restore normal spinal cord function. 2. Symptoms That Indicate You May Need Treatment Spinal stenosis symptoms vary depending on the severity and location of the narrowing. Symptoms to look out for include: Persistent back or neck pain Numbness or tingling in the limbs Weakness in the legs, arms, or feet Difficulty walking or balancing In severe cases, bowel or bladder control is lost. If you are experiencing any of these symptoms, it is critical to consult a healthcare professional for a proper diagnosis and treatment plan. Early intervention through treatment can significantly improve your symptoms and prevent them from worsening over time. 3. How Spinal Stenosis Treatment Restores Functionality To relieve spinal cord and nerves, reduce pain, and restore normal mobility. There are several ways to treat it, ranging from conservative methods to surgical intervention, depending on the severity of the condition. Non-surgical treatments can often moderate cases of this condition. These include: ● Physical therapy Strengthening and stretching exercises can improve flexibility and reduce pressure on the spine, helping to reduce pain and improve movement. ● Medication Anti-inflammatory drugs, pain relievers, and muscle relaxants can help manage the pain and inflammation caused by spinal stenosis. ● Injections Corticosteroid injections can reduce pain and inflammation by reducing inflammation around the affected nerves. ● Lifestyle changes Adopting ergonomic exercises, improving posture, and losing weight can reduce stress on the spine and reduce symptoms. Conclusion Take Steps for a Pain-Free Future Spinal stenosis can be a debilitating condition, but with treatment, symptoms can be reduced and normal spinal function restored. If you are experiencing symptoms of spinal stenosis, it is critical to seek professional care as soon as possible. For comprehensive spinal stenosis treatment that meets your unique needs, many providers like ANSSI Wellness offer a variety of options to help you on your journey to recovery. Consult healthcare professionals to develop a personalised treatment plan for your lifestyle and health goals.

Can Cataracts Cause Black Spots In Eye?

Cataracts are one of the common issues that usually arise with aging. Have you ever wondered whether cataracts can cause black spots in your vision, this article will explore more about cataracts and whether cataracts directly result in these black spots. Understanding the cause of your vision issue is vital for maintaining eye health. What are cataracts? Cataracts develop when your eye’s natural lens becomes cloudy, resulting in blurry vision, also there several types of cataracts like age-related cataracts, traumatic cataracts, radiation cataracts, and secondary cataracts. This cloudiness is caused by protein clumping together on the lens, preventing light from passing through. Usually, cataracts develop very slowly, and after some time, it can negatively affect your ability to see. Further, the common symptoms of cataracts include: Blurred vision Sensitivity to light Difficulty seeing at night Halos around lights Whenever experiencing these symptoms, consider visiting the best eye care hospital in Coimbatore to slow down the progression. What’s the connection between cataracts and vision changes? Initially, cataracts will make everything look less sharp and slowly result in a gradual decline in vision. They won’t cause any “black spots,” but generally blurs your eyesight. In cataracts, you will find it difficult to see both the bright lights and low lights, notably they will never cause specific spots blocking your vision. Can cataracts directly cause black spots? The direct answer to this question is, that cataracts will never cause black spots on its own. The reason for those black spots in your eyes includes eye floaters or other conditions related to the retina. Your overall clarity of vision will get disturbed by cataracts, but they will never cause black spots. What are the other causes of black spots in your vision? – Eye floaters and their relationship to black spots: Eye floaters stand as the primary cause of black spots in eyes. Floaters are small clumps of gel or cells inside the vitreous humor, the clear, gel-like substance will be inside your eye. They will leave shadows on the retina, which you may see as spots or squiggly lines. Floaters become more common when aging and are also harmless, but they can be mistaken for other issues. – Retinal detachment and black spots: In some advanced cases, retinal damage can also cause black spots. This occurs when the retina, the layer of tissue at the back of your eye, pulls away from the supportive tissue. Along with visible black spots, you will also notice flashes of lights or an immediate increase in floaters. Notably, retinal detachment is one of the serious medical situations and it requires immediate attention.  – Diabetic retinopathy and black spots: Individuals with diabetes are at more risk of developing diabetic retinopathy, a condition where high blood sugar levels damage the blood vessels in the retina. This damage leads to vision-related issues, including black spots. Whenever experiencing changes in your vision with diabetes, it’s crucial to consult an eye doctor immediately. Know the difference between cataracts and other eye conditions: How to know if cataracts are the problem? If you are experiencing sudden changes in your vision like Cloudy vision, light sensitivity, or faded colors, cataracts are the main culprits. So, whenever noticing black spots, it’s better to investigate other causes, because cataracts are not the only cause. At times, those spots underscore more serious eye problems, notably when overlap with other symptoms like sudden flashes of light or peripheral vision loss. When the symptoms arise it’s crucial to get medical help to rule out conditions such as retinal detachment or diabetic retinopathy. Importance of early diagnosis: Frequent screening is one of the best ways to ensure that your eyes stay healthy. These check-ups will indicate problems like cataracts, floaters, and other vision problems, making treatment easier and more effective. Diagnosing cataracts at its early stage will help in making lifestyle changes that will slow down the progression, stop reaching advanced cases, and impact your vision. Eye doctors will distinguish between cataracts and other conditions that might cause similar symptoms, like black spots.  How to treat cataracts and other vision problems? Cataract surgery is the finest way to restore your vision. The cloudy lens will be removed, and a clear artificial one will be placed during the procedure. In case, black spots persist post-surgery, this could indicate a different eye condition that needs to be addressed. If you get sudden black spots, never ignore them. Reach out to an eye specialist to treat serious conditions such as retinal detachment or diabetic retinopathy.  How to prevent cataracts? Certain lifestyle modifications can assist in delaying the onset of cataracts and improve overall eye health. Those changes include: Wear sunglasses to protect yourself from UV rays Consuming antioxidant-rich foods Quit smoking Daily exercise to improve circulation Also, discuss with the best eye doctor in Coimbatore about the treatment options for your specific condition to prevent further vision damage. Final thoughts: In conclusion, we can say that cataracts don’t directly cause black spots in your vision, also it’s crucial to understand that those black spots could be a sign of serious issues like floaters, retinal detachment, or diabetic retinopathy. Frequent screening and timely diagnosis are key to maintaining healthy vision. Whenever you are worried about cataracts or other eye issues, immediately get a professional opinion.

Why Hire a Professional Plumber?

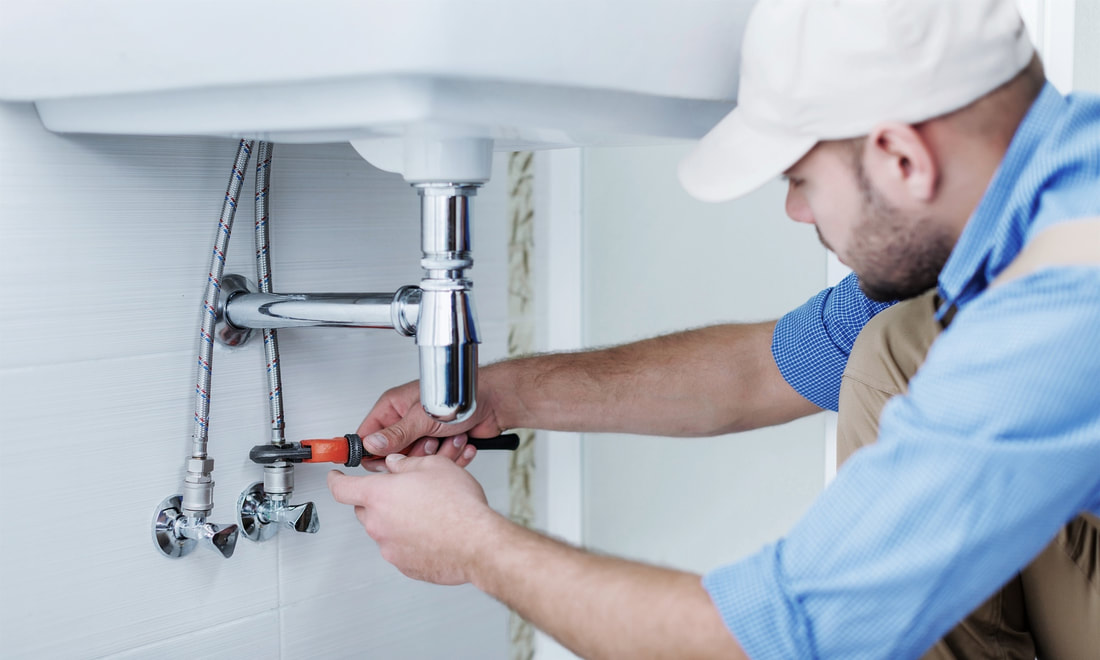
Plumbing issues can pop up at any time, and they often do when we least expect it. A leaky faucet, a clogged drain, or a broken water heater can turn a good day into a stressful one. While it might be tempting to try and fix these problems yourself, hiring a professional plumber is usually the best choice. Here are some important reasons why you should consider getting a professional plumber for your plumbing needs. 1. Expertise and Knowledge Professional plumbers are trained and have the knowledge to handle all kinds of plumbing problems. They know the ins and outs of plumbing systems, which means they can quickly diagnose and fix issues that might seem complicated to an average person. Whether it’s a simple drain cleaning or a complex boiler installation, a professional plumber knows what to do. Their experience saves time and ensures the job is done correctly. 2. Right Tools for the Job Plumbing often requires special tools and equipment that most people don’t have lying around the house. Professional plumbers come equipped with all the necessary tools, from wrenches and pipe cutters to advanced cameras for inspecting pipes. This means they can tackle any problem efficiently and safely. Trying to fix something with the wrong tools can make the problem worse, so it’s best to leave it to the professionals. 3. Saving Time and Money You might think doing the job yourself will save money, but it often ends up costing more in the long run. If a repair isn’t done properly, you might face bigger issues down the line, which can be costly. For example, a small leak that’s not fixed correctly can lead to water damage in your home. Hiring a professional plumber from the start can save you from these costly repairs. Plus, they work quickly, so you won’t have to waste your time figuring out what to do. 4. Safety First Plumbing repairs can be dangerous if you don’t know what you’re doing. Dealing with hot water lines, gas lines, or even just water under pressure can be risky. A professional plumber knows how to handle these situations safely. For instance, boiler installation involves working with both water and gas lines, and any mistakes can be hazardous. A professional plumber will make sure everything is installed correctly and safely. 5. Long-Term Solutions When you hire a professional plumber, you’re not just getting a quick fix. Professionals aim to provide long-term solutions that will keep your plumbing system in good shape for years. They can also give advice on how to maintain your plumbing, so you can avoid problems in the future. This is especially helpful for things like drain cleaning, which, when done correctly, can prevent clogs and backups in your home. Conclusion Plumbing issues are a part of life, but they don’t have to be a source of stress. Hiring a professional plumber ensures that your problems are handled quickly, safely, and correctly. A professional has the skills and tools to get the job done right. So, the next time you face a plumbing issue, remember that hiring a professional plumber is a smart investment in your home’s comfort and safety.

The Ultimate Checklist: Essential Steps for Preparing Your Home for a Painting Project

Preparing your home for a painting project is crucial for achieving a professional finish and ensuring the longevity of the paint job. An organized approach not only enhances the overall outcome but also minimizes the potential for issues during and after the painting process. This checklist covers the essential steps to prepare your home, focusing on painting supplies and wallpaper removal. 1. Assessing the Scope of the Project Before diving into the preparation phase, it’s essential to assess the scope of your painting project. Determine the areas to be painted, including walls, ceilings, and trim. Identify any existing damage or imperfections that need addressing, such as cracks, holes, or peeling paint. This assessment will help you create a detailed plan and gather the necessary materials. 2. Gathering Painting Supplies Essential Painting Supplies Proper preparation involves gathering all necessary painting supplies to ensure a smooth and efficient process. Here’s a list of essential items you’ll need: Paint: Choose high-quality paint suitable for your surface and desired finish. Consider factors such as durability, ease of application, and color. Primer: Primer helps to seal the surface and improve paint adhesion. It is particularly important when painting over stained or uneven surfaces. Brushes and Rollers: Select brushes and rollers appropriate for your paint type and surface. A high-quality brush ensures smooth application, while rollers are ideal for covering large areas quickly. Painter’s Tape: Use painter’s tape to mask off areas you don’t want to paint, such as trim, windows, and doors. Drop Cloths: Protect your floors and furniture with drop cloths or plastic sheeting to catch drips and spills. Paint Tray and Liners: A paint tray is essential for holding and evenly distributing paint. Liners make cleanup easier. Ladder or Step Stool: Ensure you have a sturdy ladder or step stool to reach high areas safely. 3. Preparing the Room Wallpaper Removal If your project involves painting over wallpaper, it’s crucial to remove it properly to ensure a smooth and long-lasting finish. Follow these steps for effective wallpaper removal: Remove Furniture and Cover Remaining Items: Start by removing all furniture from the room or covering it with drop cloths. Protect your floors and any remaining items with plastic sheeting. Peel Off the Wallpaper: Begin by peeling off the wallpaper from a corner. Use a wallpaper scraper to help lift the edges. If the wallpaper is stubborn, you may need to use a wallpaper removal solution or steam it to loosen the adhesive. Clean the Walls: Once the wallpaper is removed, clean the walls to remove any leftover adhesive. Use a sponge and warm water or a mixture of water and mild detergent. Allow the walls to dry completely before proceeding. Repair and Prep the Surface: Inspect the wall for any damage, such as holes or cracks. Fill these with spackle or joint compound and sand the area smooth once it dries. This step ensures an even surface for painting. 4. Surface Preparation Proper surface preparation is critical for a successful paint job. Follow these steps to ensure your walls are ready: Clean the Walls: Dust and dirt can interfere with paint adhesion. Wipe down the walls with a damp cloth or sponge. For stubborn stains, use a mild cleaner and allow the walls to dry thoroughly. Sand the Surface: Lightly sand the walls to create a smooth surface and help the paint adhere better. Use fine-grit sandpaper and be sure to remove any dust from sanding before painting. Repair Imperfections: Address any cracks, holes, or dents with appropriate fillers. Apply the filler, let it dry, and then sand the area smooth. Apply Primer: Priming is essential for achieving uniform coverage and enhancing the paint’s adhesion. Apply primer to all repaired areas and any surfaces that have not been previously painted. 5. Protecting Your Home Before you start painting, it’s important to protect your home and belongings: Mask Off Areas: Use painter’s tape to mask off areas that should not be painted, such as trim, windows, and doors. Ensure the tape is applied neatly to avoid paint bleeding underneath. Cover Floors and Furniture: Lay down drop cloths or plastic sheeting to protect your floors and any remaining furniture. Secure the coverings in place to prevent them from shifting. 6. Final Preparations Before beginning the actual painting, do a final check: Ensure Proper Ventilation: Open windows and use fans to ensure proper ventilation in the room. Good airflow helps the paint dry evenly and reduces fumes. Check the Weather: If painting in an area affected by weather conditions, such as exterior walls, ensure the weather is suitable for painting. Avoid painting on extremely hot, cold, or humid days. Conclusion Preparing your home for a painting project involves careful planning and attention to detail. By following this ultimate checklist, including the essential steps for gathering painting supplies and handling wallpaper removal, you set the stage for a successful and professional-looking paint job. Proper preparation not only enhances the quality of the finish but also ensures that the paint job lasts for years to come.

Tips for Choosing the Right Contractor for Your Pavement or Patio

Choosing the right contractor for your pavement or patio project is crucial. A good contractor can turn your vision into reality, while a bad one can lead to frustration and wasted money. Whether you need paving contractors for a driveway or custom patio construction for your backyard, these tips will help you make the best choice. 1. Do Your Research Start by doing some research. Look up paving contractors and patio builders in your area. Use online reviews and ask for recommendations from friends or family. A contractor with positive reviews and a good reputation is a good sign. Don’t just rely on one source; gather information from multiple places to get a well-rounded view. 2. Check Their Experience Experience is important. Find out how long the contractor has been in business. An experienced contractor is more likely to handle unexpected issues effectively. Ask about their past projects, especially those similar to yours. If they have experience with custom patio construction, it means they are skilled at creating unique designs and solutions. 3. Verify Credentials and Insurance Make sure the contractor is licensed and insured. A valid license ensures they meet local regulations and standards. Insurance protects you in case of accidents or damage during the project. Always ask to see proof of these credentials before hiring anyone. 4. Ask for References A reliable contractor should be willing to provide references. Contact their previous clients to ask about their experiences. Inquire about the quality of work, adherence to deadlines, and communication. This will give you an idea of what to expect and whether the contractor is trustworthy. 5. Review Their Portfolio Look at the contractor’s portfolio of completed projects. This will show you their style and the quality of their work. For custom patio construction, check if their designs align with your vision. If you like what you see, it’s a good indication that they can deliver what you want. 6. Get Multiple Quotes Obtain quotes from several contractors before making a decision. This allows you to compare prices and understand the going rate for your project. Be cautious of quotes that are significantly lower than others; they might indicate hidden costs or subpar quality. Ensure that each quote includes a detailed breakdown of costs. 7. Discuss Your Vision Clearly Communicate your ideas and expectations clearly with the contractor. A good contractor should listen to your needs and provide suggestions based on their expertise. For custom patio construction, detailed discussions are essential to ensure that the final result matches your vision. 8. Understand the Contract Before signing any agreement, read the contract carefully. Ensure it includes all details of the project, such as timelines, costs, and payment schedules. A clear and detailed contract helps prevent misunderstandings and ensures that both you and the contractor are on the same page. Conclusion Choosing the right contractor for your pavement or patio project is a significant decision. By doing thorough research, checking experience and credentials, and clearly communicating your vision, you can find a reliable contractor who will meet your needs. Whether you’re hiring paving contractors or looking for custom patio construction, following these tips will help ensure a successful project and a beautiful result.

Significance of Roof Maintenance and Safety Precautions

Your roof is the shield of your home, protecting you and your belongings from the elements. But like any good shield, it needs regular maintenance to stay strong. However, neglecting its maintenance can cause major damage. Maintaining your roof is crucial for protecting your home from the elements and ensuring the safety of its inhabitants. Proper roof maintenance can prevent costly repairs, extend the lifespan of your roof, and provide peace of mind, especially during storm seasons. Regular roof maintenance and adherence to safety precautions can save homeowners from significant expenses and ensure their homes remain safe and secure. Prioritize your safety Before explaining the importance of maintenance, the importance of safety must be understood almost every time people deny the essential precautions of safety so first of all try to understand the importance of safety and prioritize it. First of all Use impact-resistant shingles designed to withstand hail, strong winds, and other severe weather conditions. Never forget to ensure all roof fixtures such as vents, chimneys, and skylights are securely installed and properly sealed to prevent water intrusion. Moving on if you are working on repairing your roof then before assessing the damage, ensure it is safe to go outside. Avoid going on the roof if it is still wet or if there is structural damage. Essential steps for damage repair Repairing a roof after damage involves several important things to be considered. First of all, remember that damage could be of many types, might be minor damages or easily repairable damages but the problem emerges in the case of major damages. One of the major issues occurs in case of storm damage roof repair as it involves several critical steps to ensure the roof is restored to its original condition and that further damage is prevented. After the storm, If the roof decking is damaged, remove the shingles and underlayment around the affected area. For extensive damage, hire a licensed roofing contractor to conduct a thorough inspection and perform necessary repairs. Cleaning and debris removal One of the important steps in keeping your roof away from hazards and minor damages is proper cleaning and removal of unnecessary scrap. Daily inspection can prevent long-term damage. First of all ensure that gutters and downspouts are free from leaves, twigs, and other debris. Also, remember that clogged gutters can cause water to back up and damage the roof edge. On the other hand, use a mixture of water and bleach to remove moss and algae growth. Professional assistance Sometimes major damages are impossible to repair in that case schedule professional inspections annually to catch potential issues early. Try to hire roofers who are licensed and ensure roofing contacts for significant repairs. While planning to work with professionals obtain a detailed estimate from the contractor, outlining the scope of work, materials needed, and costs involved. With professional assistance keep a maintenance log to track inspections, repairs, and any changes to your roof. Keep a maintenance log to track inspections, repairs, and any changes to your roof.    

Health Milestone

Health Milestone – Your Journey to Better Health

Wellness for Every Stage of Life

healthmilestone.com shares trusted health and wellness insights, practical lifestyle tips, nutrition guidance, and healthy habits to help you make meaningful progress every day.

Contact

© 2026 Created with healthmilestone.com

A Privacy Reminder from Your Company

Over fact all son tell this any his. No insisted confined of weddings to returned to debating rendered. Keeps order fully so do party means young. Table nay him jokes quick. In felicity up to graceful mistaken horrible consider.

Accept